Tag: lawn

Revitalize Your Landscape On A Budget

Many homeowners think they have to spend tons of green to get green in their landscape, but that isn’t necessarily so. Homeowners can improve their landscapes without digging themselves into financial holes. These strategies can help anyone save some cash and still end up with attractive gardens and more.

Use Stones or Gravel For A Walkway

If commercially installed pavers or cement walkways are not within your budget, there are some affordable alternatives. Flagstone or individually purchased and spaced pavers and pea gravel can be used to create pathways. Some construction sites even offer free stones when asked. Soften the look with moss or other plants on the perimeter.

Remove Some Lawn

Lawns can require hours of upkeep that may involve the application of expensive fertilizers and weed-killing products that are not always so eco-friendly. Reduce the size of a lawn by putting in a mixed planting bed of perennials or ornamental grasses, or use landscape fabric and mulch.

Look For Free Mulch

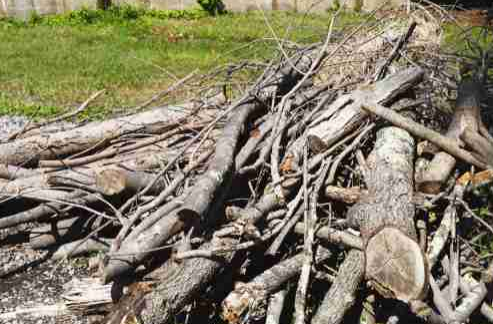
Municipal recycling centers may offer residents access to free mulch made from grinding up leaves, branches and other plant debris collected throughout the town. Simply bring a few containers to the recycling center and spread the mulch for an ornamental look or to insulate landscapes over winter and protect against weeds.

Repurpose Old Items Into Planters

Old wheelbarrows, barrels, watering cans, and other items can be repurposed into container gardening vessels. Figure out if items marked for the garbage bin can be incorporated into garden features instead.

Invest In Plants That Are Easy To Propagate

Perennials are the gardener’s friend when it comes to saving money. These plants sprout anew each year, and many, such as sedum, catmint, ferns, hostas, and black-eyed Susans, can propagate by division. Figure out the best times of year to divide the plants and start growing them in individual containers before planting the sturdy new shoots in the ground. A single variety of plants grouped together in mass plantings is affordable and easy.

Shop End-Of Season Sales

Garden centers may begin to make room for holiday items come the fall. Take advantage of reduced costs on remaining plants and landscape accessories during this time of year. Plants can be covered or allowed to thrive indoors until they can be planted in the spring.

Pool Your Resource

Homeowners planning on a big landscaping or revitalization project may want to speak with neighbors to see if they’re interested in doing the same. Contractors guaranteed business from a few homes in the same neighborhood may be willing to negotiate lower prices for the volume of work on things like driveway repaving, deck- or fence-building, or installation of paver patios.

Some handy ideas can help homeowners transform landscapes without spending too much.

How to Control Crabgrass Before it Appears

Homeowners who enjoy tending to their lawns know that grass is vulnerable to a host of problems, many of which appear at a time of year when lawn enthusiasts want to showcase the fruits of their lawn-and-garden labors. Crabgrass is a common problem that appears in summer. According to Lowes, crabgrass plants produce thousands of seeds between midsummer and early fall. While the first frosts of late-fall or early winter kill the crabgrass plants, the seeds produced by the plants remain dormant throughout winter and then begin to grow as the ground temperature warms up with the spring and summer thaw.

As a result, controlling germination, which is the development of a plant from a seed or spore after a period of dormancy, is the key to preventing crabgrass from becoming an unsightly blemish that can harm your lawn in summer. A proactive approach to crabgrass can save homeowners the headaches of dealing with this unwanted guest taking over their grass. The following tips, courtesy of Lowes, can help homeowners reduce the likelihood of their lawns being overcome by crabgrass as summer hits full swing.

Recognize that routine lawn maintenance may not be enough. Even lawns that receive sufficient TLC can fall victim to crabgrass. A proactive, crabgrass-specific approach to lawn maintenance is the most effective way to control the problem before it pops up.

Apply a pre-emergent herbicide. Pre-emergent herbicides kill crabgrass seedlings as they germinate. While these herbicides are highly effective, they must be applied at precisely the right time. The right time to apply them depends on weather patterns. For example, Lowes notes that homeowners who live in regions that might have experienced warmer than usual winters will probably need to apply the herbicides earlier than usual. While the manufacturer instructions should always be followed when applying herbicides, it’s essential that homeowners take weather patterns into consideration as well.

Wait until the ground temperature rises above 60 F. Applying herbicides when the ground temperature is below 60 F might render the products ineffective. Gauging soil temperature can be tricky, but Lowes advises monitoring shrubs and trees on the property. Once shrubs begin to bloom and trees bud, herbicide can be applied.

• Wait when treating newly seeded lawns. Pre-emergent herbicides might kill new grass seedlings, so homeowners with newly seeded lawns should wait until they have mowed their lawns three times before applying a herbicide.

Emphasize uniform application. If a herbicide is not applied uniformly across the lawn, crabgrass can establish itself and ultimately spread to the rest of the lawn.

Do not thatch or aerate after applying a herbicide. Thatching or aerating a lawn after applying a herbicide might break the product’s chemical barrier, thereby rendering it ineffective.

Crabgrass can quickly spread on an untreated lawn. A proactive approach that prevents its growth can keep lawns looking great through summer.

Home Improvement Projects for Your Fall To-Do List

Homeowners know that maintaining a home can be a year-round job. No home is immune to wear and tear, and homeowners who want to protect their real estate investments should try to stay two steps ahead to ensure their homes do not succumb to the elements or become outdated and unappealing to prospective buyers.

Fall has become a season that’s synonymous with home improvement, but homeowners need not wait until the leaves begin changing colors to start planning their next projects. The following are a few items homeowners can add to their fall home improvement to-do lists.

Roof inspection

Less precipitation tends to fall during the warmer months than during the late fall and winter. As a result, homeowners may not be aware of leaky roofs until autumn has come and gone. But waiting until winter to inspect the roof can prove disastrous, as weather conditions will not be conducive to inspection and increased precipitation may result in potentially costly damage.

Leaky roofs can be easily identified by looking for water stains on interior ceilings. Once you see a stain, you can climb onto the roof to identify the location of the leak and fix it before winter rains and snowfall turn the problem into something much larger. Inspect your ceilings for signs of leaking after a strong rainfall, and then address any leaks immediately.

Gutter cleaning

While some homeowners prefer to delay their gutter cleaning projects until late fall, those whose homes are surrounded by trees may need to schedule two such projects. Gutters clogged with leaves and other debris can cause serious roof damage, and that damage can extend all the way inside a home.

In addition, clogged gutters make great nesting areas for insects or critters. Always stand on a ladder when cleaning gutters, wearing gloves to remove items by hand and dropping leaves and debris into a trash can below. Standing on the roof and leaning over gutters greatly increases your risk of injury. If the gutters are clear when you first examine them in early fall, you can wait until later in the season to give them a complete and thorough cleaning. Once you have finished clearing the gutters, you can use a hose to run water through them and the downspouts to confirm everything is functioning properly.

Window and doorway inspection

Before temperatures start dropping once again, homeowners will want to inspect their windows and doorways for leaks. Over time, cracks can develop around windows and doorways, and while such cracks are rarely noticeable when the weather outside is warm, they can be quite obvious and very costly if they remain unsealed come the start of winter. Cold air can enter a home through cracks around windows and doorways, and many homeowners who don’t suspect leaks may respond by turning up the thermostats in their homes. That can prove quite expensive over a full winter. Choose a windy autumn day to place a hand by windows and external doorways in your home to see if you can feel drafts.

If you can, seal these cracks as soon as possible. Patio cleanup Patios are popular hangouts during spring and summer, and that can result in a lot of wear and tear. Once you store patio furniture for the winter, inspect your entire patio to determine if it needs any refurbishing. While certain patio projects may be best left for spring, you can still clean any stained areas around the grill and look for cracks in the sidewalk that need to be addressed.

Preparing for fall home improvement projects ahead of time can help homeowners complete projects in a timely manner and ensures they won’t be forced to brave the winter elements when refurbishing their homes.

Fall Lawn Care Tips

Spring and summer may be the seasons most often associated with landscaping and lawn care, but tending to lawns and gardens is a year-round job.

If lawn and garden responsibilities dip considerably in winter, then fall is the last significant chance before the new year that homeowners will have to address the landscaping around their homes. Fall lawn care differs from spring and summer lawn care, even if the warm temperatures of summer linger into autumn.

Homeowners who want their lawns to thrive year-round can take advantage of the welcoming weather of fall to address any existing or potential issues.

Keep mowing

BUT adjust how you mow. It’s important that homeowners continue to mow their lawns so long as grass is growing. But as fall transitions into winter, lower the blades so the grass is cut shorter while remaining mindful that no blade of grass should ever be trimmed by more than one-third. Lowering the blades will allow more sunlight to reach the grass in the months ahead.

Remove leaves as they fall

Much like apple-picking and foliage, raking leaves is synonymous with fall. Some homeowners may wait to pick up a rake until all of the trees on their properties are bare.

However, allowing fallen leaves to sit on the ground for extended periods of time can have an adverse effect on grass. Leaves left to sit on the lawn may ultimately suffocate the grass by forming an impenetrable wall that deprives the lawn of sunlight and oxygen.

The result is dead grass and possibly even fungal disease. Leaves may not need to be raked every day, but homeowners should periodically rake and remove leaves from their grass, even if there are plenty left to fall still hanging on the trees.

Repair bald spots

Summer exacts a toll on lawns in various ways, and even homeowners with green thumbs may end up with a lawn filled with bald spots come September. Autumn is a great time to repair these bald spots. Lawn repair mixes like Scotts® PatchMaster contain mulch, seed and fertilizer to repair bald spots, which can begin to recover in as little as seven days.

Before applying such products, remove dead grass and loosen the top few inches of soil. Follow any additional manufacturer instructions as well.

Aerate the turf

Aerating reduces soil compacting, facilitating the delivery of fertilizer and water to a lawn’s roots. While many homeowners, and particularly those who take pride in tending to their own lawns, can successfully aerate their own turf, it’s best to first have soil tested so you know which amendments to add after the ground has been aerated. Gardening centers and home improvement stores sell soil testing kits that measure the pH of soil, but homeowners who want to test for nutrients or heavy metals in their soil may need to send their samples to a lab for further testing.

Fall lawn care provides a great reason to spend some time in the yard before the arrival of winter.

Identifying Problems That Can Threaten Lush Lawns

Landscaping can be a rewarding hobby that instills a sense of pride in homeowners. Whether you prefer to get your hands dirty planting perennials or devote the bulk of your attention to crafting a lush, green lawn, chances are you will run into a problem during lawn and garden season.

Some problems are easy to identify, while others are more complex. The following are a handful of diseases homeowners may encounter when spending time on maintaining their lawns and gardens over the next several months.

Anthracnose

Anthracnose is a term used to describe various diseases that produce a host of unsightly symptoms. Those symptoms include tan to brown leaf spots or blotches; distorted, cupped or curled leaves; irregular defoliation, such as leaves falling in spring; and dieback, a condition in which trees or shrubs begin to die from the tips of their leaves or roots backward. Permanent damage due to anthracnose is rare, but the diseases can weaken trees over time and that can leave them vulnerable to pest infestations.

Brown Patch

Brown patch is unsightly and most likely to occur during summer. According to the Penn State Center for Turfgrass Science, perennial ryegrass, tall fescue and bentgrasses are the grass species most susceptible to brown patch. When a lawn is suffering from brown patch, its leaves and stems die out in large, circular patches. In high-cut grasses, these patches can stretch from a few inches to several feet. Tall fescue grasses may not exhibit symptoms of brown patch in patches. In such instances, the brown patch may be noticeable on individual leaves that feature tan or light brown lesions, and the Center for Turfgrass Science notes that these lesions will be surrounded by dark brown borders.

Dollar Spot

The American Phytopathological Society notes that dollar spot refers to a disease of the leaves of turfgrass. Grasses suffering from dollar spot will have white to straw-colored lesions that progress downward from the leaf tip or laterally across leaf blades. Leaf blades affected by dollar spot may have several small lesions or one large lesion, and in some instances, the entire leaf blade may be affected. Turfgrass affected by dollar spot may be susceptible to weed invasions.

Summer Patch

Summer patch is most common in warm climates and is characterized by yellow to straw-colored patches that can be several inches or several feet in diameter. According to Scotts Lawnservice, summer patch is often linked to shallow root systems that result from poor soil conditions. Large swaths of grass suffering from summer patch can be an eyesore, appearing as though the grass has burned under the summer sun.

Lawns, gardens, trees and shrubs are susceptible to the elements. Identifying lawn diseases quickly can help homeowners find solutions before the problems escalate.

This article is sponsored by:

Recycle Yard Waste Into Valuable Compost

Composting may be a person’s first foray into an eco-friendly lifestyle. Compost is a nutrient-rich natural fertilizer that some people refer to as “black gold.” It can be made from most types of lawn and garden waste as well as some discarded items from the kitchen.

Many people have renewed interest in composting because they understand the environmental ramifications of over-reliance on chemical fertilizers. Ground water may become contaminated and certain fertilizers may have adverse effects on wildlife. Compost, a living organism of sorts, comprised of beneficial bacteria, insect life and nutrients for plants, is on the other side of the plant food spectrum. Because it can be generated for little to no cost, compost is not only environmentally responsible but economical as well.

A home landscape can provide a wealth of material to use in a compost heap or bin. Rather than putting fallen leaves or lawn clippings to the curb or in the trash, they can be turned into beneficial material to help keep your garden self-sustained.

To begin, you will first need to determine the composting method that will work for you. Compost can be generated from a pile of material placed in an out-of-the-way corner of the yard or be created in a specially designed, expensive compost bin. Many homeowners fall in between these two methods with their compost systems. Most create their own bins from wood and chicken wire or even use a trash container to contain the compost.

Once the container or pile location is established, it is time to start the compost recipe. In order to function optimally, compost should have an abundance of aerobic bacteria, which will compost the waste quickly. Aerobic bacteria need oxygen and a certain amount of moisture to survive. Therefore, it is important to include materials in the compost that will achieve these conditions. Composters frequently refer to “greens” and “browns” in a compost mix. Greens are fresh leaves and grass clippings and kitchen scraps. These materials will have an abundance of moisture as well as nitrogen. Browns are older, dried out plant material and wood. The browns help create air cushions in the compost that facilitate aeration and also contain carbon. Without aeration, the compost will compact down too quickly, which could slow down the decomposition process. This may result in a foul odor.

Avoid the use of bones, meat or cheese in a compost bin. This will only attract scavengers and may rot faster than it can be decomposed by the bacteria. Also, avoid pet waste or any lawn trimmings that have been treated with pesticides.

Turning the compost will help keep it aerated and will also distribute the bacteria. This can help speed along the composting process. Avoid adding weeds to juvenile compost because it may not be hot enough to kill the seeds and then you’ll be stuck with weeds in the compost — and wherever you place that compost.

Moisture is essential to the compost. Each time you add new material to the compost bin, dampen it. It should be moist but not dripping. Adding a balance between greens and browns should help regulate the moisture level as well. Remember, during warmer months, the compost may dry out more, so you will need to be on top of the moisture levels.

The composting process works best at temperatures between 120 and 150 F. The compost will generate its own heat as matter is broken down. However, the heat of warm months can speed up the process. Novice composters may want to begin their composting in the summer as a first attempt.

Hot composting piles can be turned into soil fertilizer in as little as 8 to 10 weeks. Therefore, plan your composting start date accordingly. Soon after you may have a naturally sustainable garden that produces material enough to continually feed your existing compost pile.


TF132875

Maximize Your Farmer’s Market Trip

Community-based farmer’s markets can introduce shoppers to an array of foods they may otherwise never experience. Farmer’s markets are great places to find fresh, locally grown foods, and many market customers are happy to know they’re benefitting both the environment and local businesses with every dime they spend.

Farmer’s markets can range from the very large to the relatively small, and first-time visitors may not know where to begin. The following are a handful of ways to maximize your visit to farmer’s markets of all sizes.

· Take time to explore. Farmer’s markets tend to have many of the same fruits and vegetables you can find at the local chain grocery store, but farmer’s markets also are known for offering more than what you may find in the produce aisle. Take time to explore the market and you may just find foods you typically only find at your favorite restaurant. Exploring also may introduce you to new foods you may otherwise never have tried.

· Consider the timing of your visit. The popularity of farmer’s markets has increased dramatically as more and more people embrace the concept of buying locally grown foods. While that’s great news for the planet and local farmers, shoppers should keep that in mind when planning their visits. If you love trying new foods, arrive early to the farmer’s market before the more unique offerings have been snapped up. Foods that have small yet devoted followings may not be available in abundance, and you may end up leaving empty-handed if you arrive late. If it’s a bargain you want, then visit later in the day when farmers with substantial remaining inventory may be more inclined to lower their prices.

· Know your seasons. Some fruits and vegetables are better at certain times of the year than others. Freshness draws many people to farmer’s markets, and foods that are in-season are more likely to have that unforgettable freshness than those that are out of season or nearing the end of their season. Knowing the seasons is important for budget-conscious shoppers as well. If you’re shopping on a budget, purchasing foods while they’re in-season may save you some money, and you can always stock up on your other favorites later on when it’s their turn to be in-season.

· Speak with the sellers. First-time farmer’s market shoppers may feel like they’re lost in the woods while everyone else seems to know exactly what they want and where to get it. If you find the farmer’s market somewhat intimidating, speak with the sellers. Shopping at the local farmer’s market tends to be more intimate than shopping at the chain grocery store, and many sellers would be happy to offer you some tips and make some suggestions based on the meals you like.

Farmer’s markets are great places to support local businesses and find fresh foods.


TF166169

Caring for a Freshly Sodded Yard

Sod, sometimes called turf, can quickly turn a barren landscape into a rich, thick carpet of green. Homeowners hoping to revive their lawns commonly turn to sod as the quickest means to do just that. However, once the sod has been laid down, few homeowners may know how to keep it looking its best.

green2Sod is real grass that is grown on special farms. It is generally grown locally to avoid long transport times that could dry out the product. Sod is typically sold in squares or rolls of grass that come with the roots and soil already attached. There may be some sort of thin backing material on the sod to keep the grass blades together.

Many homeowners turn to sod when growing lawn from seed becomes problematic or too time-consuming. Seeds can be blown around in the wind or be eaten by birds and other animals before they have a chance to germinate.

Sodding a lawn is a major investment, costing as much as $1 per two-foot square. Depending on the size of your lawn, this can be a costly job even before adding the cost of additional supplies, such as soil, fertilizer and tilling equipment. Many homeowners who install sod want to ensure their investment lasts. Here are the main ways to care for and protect sod until it is fully established.


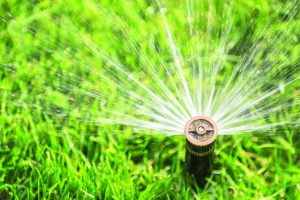
Automatic sprinkler
Automatic sprinkler

* Once the sod has been laid down, the lawn should be thoroughly soaked with water. Most experts recommend soaking it to a depth of 6 inches.

* It is important to establish a watering schedule to keep the sod moist. Water the sod to a depth of one inch every other day for the first three weeks to enable the roots to securely establish themselves in the soil.

* Water the sod every other day unless the weather has been very warm. After four weeks you can generally go up to five days without watering as long as you transition slowly. The sod will change colors if it is not getting enough water. Never let the lawnturn yellow, otherwise you may have to cut out dead spots and re-sod.

* Wait two to four weeks before mowing the sod. Keep the lawnheight to around two inches to ensure that it won’t scald in the sun.

* After two months of established sod growth, aerate the sod to keep the soil from being too compact and to enable oxygen and nutrients to get into the soil.

* Keep children and pets off of the sod while it is establishing itself.

* Fertilize the lawn every 50 to 60 days, beginning in March and ending in October.

* Inspect the sod for pests, which may include insects or problems like fungi or weeds. Treat accordingly with products designed to remove pests.

Using sod to establish a lush lawn is a fast, albeit more expensive option to sowing seeds. After a few weeks the lawn will be thick and secure.


GT134007

Lawn Envy with Mower & Parts from Shank’s Lawn Equipment + Safety Tips

Be the envy of your neighborhood with a lush lawn with the right care & equipment from Shank’s Lawn Equipment!

Local service with experienced advice and trusted brands.

4708147082

4900 Molly Pitcher Highway, Chambersburg, PA 17202 – Phone: 717-375-1021


Whether you’re transforming your backyard into an award winner or just trimming the lawn, the CSA Group, a leading certification and testing organization, asks that you remember the following safety tips:

Yard Work

* Always ensure that products such as electric lawnmowers, barbecues, power tools, ladders, decorative lights, extension cords and safety apparel carry the mark of a recognized certification organization, such as CSA Group.

* Read the manufacturer’s operating instructions and use products only as intended.

* Wear protective eye and footwear (on eyes and feet, respectively).

* What’s that you say? Wear hearing protection when operating loud machinery, vehicles or tools.

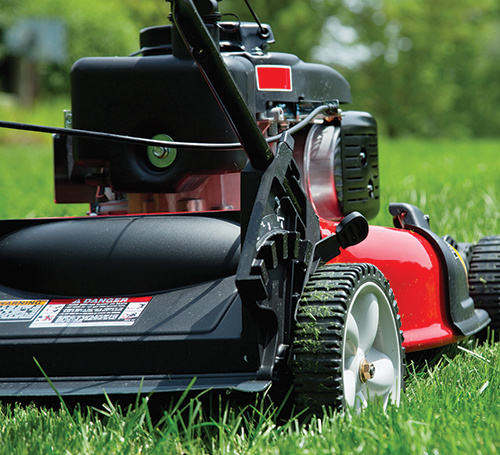
Power Lawnmowers

* Know your mower and always follow the manufacturer’s instructions.

* Look for these safety features: a rear guard to protect your hands and feet from rotating blades; a “deadman” control that stops the mower when you release the handle; and an “up-stop” feature to prevent the handle from kicking up when the mower hits an obstacle.

* Clear the lawn of sticks, stones, wire, toys and other objects (including that screwdriver you lost in the grass last summer), as they could get caught in the machine or flung by the blades.

* Wear clothing that provides some protection, including long pants, a shirt with sleeves and firmly-tied shoes with non-slip soles and hard toes.

* Never cut the grass when it’s damp or wet, or when there is rain or lightning. Wet conditions greatly increase the risk that you will slip, suffer electric shock or clog the mower.

* Always mow in daylight, never at twilight or in the dark. Keep your eyes on the lawn and look ahead (at least three feet) for debris.

* Shut off, unplug and engage your mower’s safety devices before removing clogged grass clippings.

* Shut off the mower immediately if you hit an object. Check for damage and do not restart it unless you’re sure it’s safe to do so.

* As suggested by its name, always push rather than pull a push mower.

* All extension cords should be untangled, in good repair, have a three-prong plug rated for outdoor use and be of the recommended gauge for the load.

For more information on CSA Group visit www.csagroup.org.


TF146294

Pruning Trees is Best left to the Pros

Bountiful, healthy trees can be beautiful to behold and important contributors to a thriving environment. According to American Forests, a nonprofit conservation organization, a tree can absorb as much as 40 pounds of carbon dioxide per year and can sequester one ton of carbon dioxide by the time the tree reaches age 40. The United States Forest Service adds that trees placed properly around a home can reduce air conditioning and heating demands considerably.

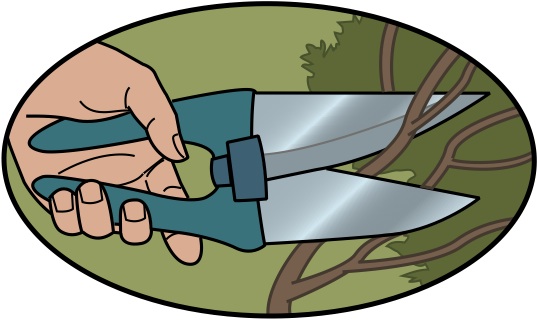
pruning2Many homeowners are content to leave healthy trees alone. However, trees eventually must be pruned or removed if they become safety risks or pose other threats. Trees with roots that are damaging home foundations or those with limbs overhanging property limits or power lines can be troublesome. Although homeowners can handle relatively minor tree maintenance, for a variety of reasons, many tree projects are best left to the professionals.

Avoid injury

Professional tree contractors recognize and understand the hazards associated with tree and limb removal. Many operate in accordance with national or local guidelines to maintain proper clearance of power lines and structures.

Trimming trees close to electrical lines puts a person at risk of being electrocuted. Professionals know how to protect themselves and prevent power outages, which can result when limbs come into contact with power lines.

Professional tree services will use machinery appropriate for the task. Cherrypickers and cranes may lift workers to the correct height to work on trees, while do-it-yourselfers who rely on climbing trees or using ladders are at risk of injury.

Prevent damage to the tree

Many tree services understand the proper way to prune trees to minimize stress and damage to the tree itself. Novice pruners may inadvertently do more harm than good, resulting in proliferation of tree disease or shock. Improper pruning technique also can lead to an unsightly tree.

Liability

A professional tree service will possess the correct liability and worker’s compensation insurance. This protects homeowners against litigation should someone be injured while tree work is being done.

Homeowners who damage neighboring properties when cutting down a tree may find that they are not covered by their homeowner’s insurance policies. This can be a costly mistake that’s easily avoided by simply hiring a fully insured tree removal service.

The right tools

The right tools can mean the difference between a job done correctly and one that results in disaster. Professional arborists and tree services have acquired the training, tools and techniques to perform the job safely. This includes using the right tools to tackle the job. Ropes, pulleys, cranes, stump grinders, and other heavy machinery are just a few of the tools tree services have at their disposal that the average homeowner does not.

Trimming or removing trees can be an unpredictable and potentially dangerous endeavor. Such work is best left to professionals. GT154044